Appearance
Mesh Generation Module Guide
The Mesh Generation module converts segmented image stacks into 3D surface meshes using the Marching Cubes algorithm. These meshes can be visualized interactively, exported for 3D modeling software, or prepared for 3D printing.
For a conceptual overview, see Mesh Generation.
 The Mesh Generation module after successfully creating a 3D mesh with download options
Prerequisites
Before using this module, ensure you have:
- A segmented TIFF stack (from Segmentation inference or the Annotation tool)
- The segmentation must contain at least one labeled class (non-background pixels)
Quick Start
- Launch module — Click "Mesh Generation" from the workspace hub
- Select segmentation — Choose a segmentation result or annotation file
- Choose formats — Select output formats (JSON, OBJ, STL)
- Generate — Click "Generate Mesh" and wait for processing
- Use results — Download files or open in 3D Visualization
Step-by-Step Guide
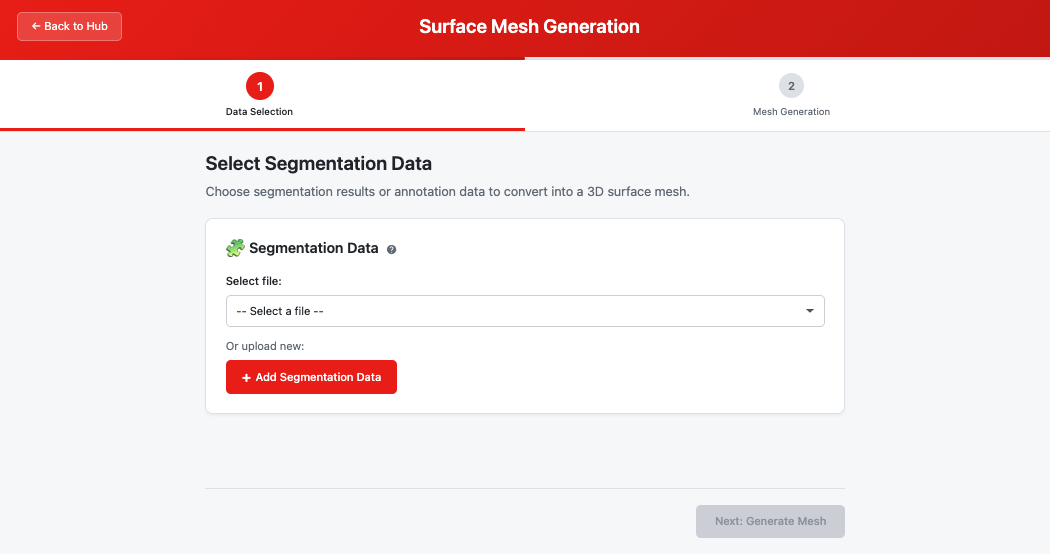
Step 1: Data Selection
Select the segmentation data to convert into a 3D mesh.
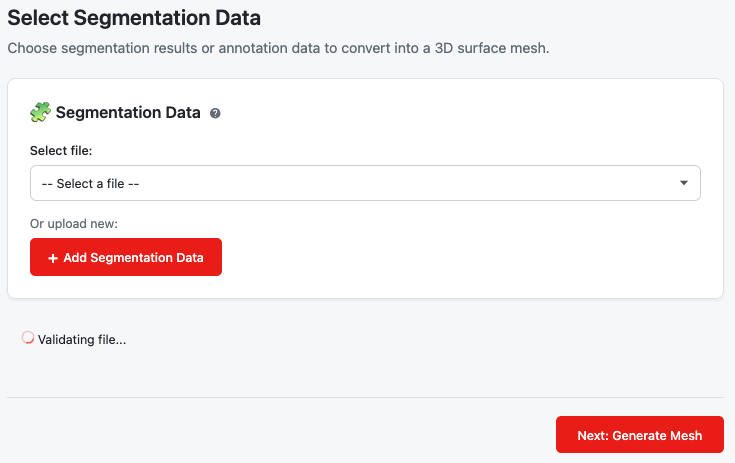 Step 1 data selection with segmentation file validation
Input Options
| Source | Description | When to Use |
|---|---|---|
| Recent Results | Segmentation outputs from U-Net inference | After running segmentation inference |
| Annotation Files | Masks from the Annotation Tool | For manually created segmentations |
| Uploaded Files | Any labeled TIFF stack | For external segmentation data |
File Requirements
- Format: Multi-page TIFF (.tif or .tiff)
- Pixel Values: Integer class labels (0 = background, 1-255 = object classes)
- Bit Depth: 8-bit recommended (16-bit auto-converts)
Validation
The module validates your file to ensure it's a proper segmentation:
| Check | What It Means |
|---|---|
| Class Detection | File must contain at least one non-background class |
| Value Range | Rejects files with too many unique values (likely raw images) |
| Data Type | Must be integer type, not floating point |
Note: Invalid uploaded files are automatically removed from your workspace to keep it clean.
For more details, see Segmentation Data.
Click "Next: Generate Mesh" to proceed to Step 2.
Step 2: Mesh Generation
Configure output options and generate your mesh.
 Step 2 with data summary, format selection, and class options
Data Summary
Before generating, you'll see a summary of your selected file:
| Information | Example |
|---|---|
| Filename | inference_result.tif |
| Dimensions | 64 × 512 × 512 (slices × height × width) |
| Detected Classes | Class 1, Class 2 |
| Data Type | uint8 |
| Preview | Thumbnail of middle slice |
Output Format Options
Select one or more output formats:
| Format | Description | Use Case |
|---|---|---|
| Three.js JSON | Optimized for built-in 3D viewer | Interactive visualization in browser |
| OBJ (Wavefront) | Industry-standard 3D format | Blender, Maya, 3ds Max, etc. |
| STL | Stereolithography format | 3D printing |
Tip: Select Three.js JSON if you want to use the built-in 3D Visualization module. Add OBJ or STL if you need to work with external software.
Class Selection
Choose which classes to include in the mesh:
- All Classes (default) — Generates surfaces for every detected class
- Individual Class — Select a specific class to mesh only that region
For more details, see Output Options.
Click "Generate Mesh" to start processing.
Processing
During mesh generation, you'll see real-time progress updates.
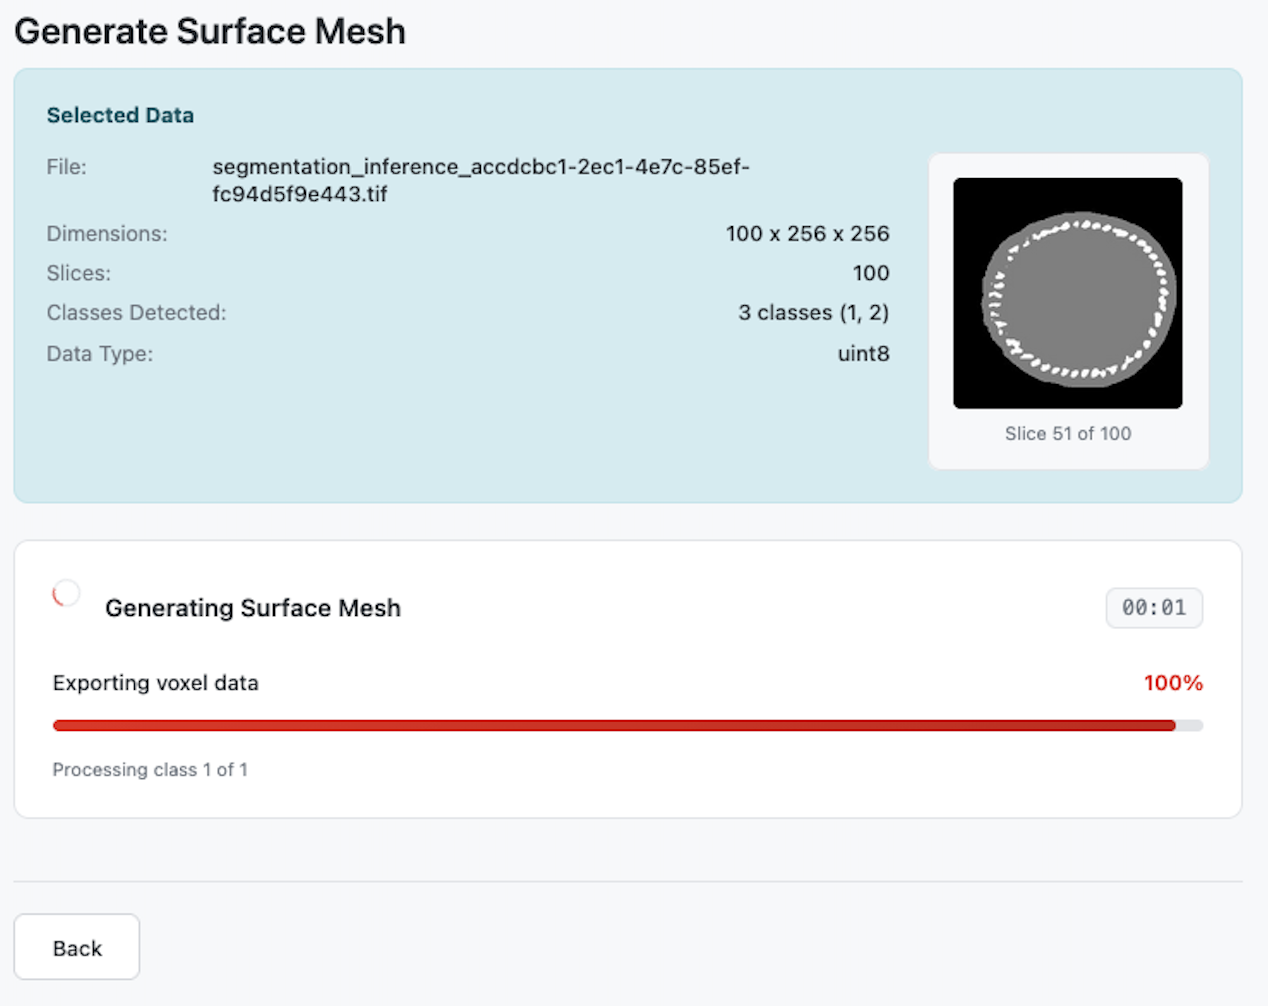 Mesh generation progress with status and elapsed time
Progress Indicators
| Element | Description |
|---|---|
| Status Text | Current operation (e.g., "Processing class 1 of 3") |
| Progress Bar | Visual percentage complete |
| Percentage | Numeric progress (0-100%) |
| Elapsed Time | How long generation has been running |
Note: Generation time depends on data size and number of classes. Large volumes may take several minutes.
Results
After generation completes, you'll see the results summary.
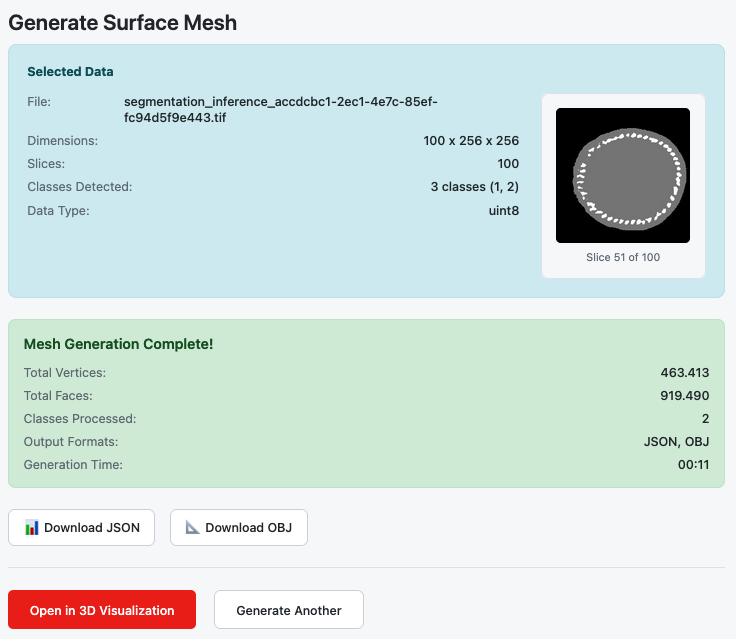 Results section with mesh statistics and download options
Statistics Displayed
| Metric | Description |
|---|---|
| Total Vertices | Number of 3D points in the mesh |
| Total Faces | Number of triangular surfaces |
| Classes Processed | How many classes were meshed |
| Output Formats | Which formats were generated |
| Generation Time | Total processing duration |
Download Options
Each generated format has its own download button:
| Button | Downloads |
|---|---|
| Download JSON | mesh_data.json — Three.js format |
| Download OBJ | mesh.obj + mesh.mtl — Wavefront format with materials |
| Download STL | mesh.stl — Binary STL for 3D printing |
Actions
- Open in 3D Visualization — Launch the interactive 3D viewer with your mesh
- Generate Another — Return to Step 1 to create another mesh
Output Files
| File | Format | Description | Location |
|---|---|---|---|
mesh_data.json | Three.js | Optimized mesh for web viewer | results/meshes/{meshId}/ |
mesh.obj | Wavefront | 3D model with geometry | results/meshes/{meshId}/ |
mesh.mtl | Material | Color definitions for OBJ | results/meshes/{meshId}/ |
mesh.stl | STL | 3D printing format | results/meshes/{meshId}/ |
metadata.json | JSON | Generation statistics | results/meshes/{meshId}/ |
Troubleshooting
| Issue | Cause | Solution |
|---|---|---|
| "No object classes found" | File contains only background (0 values) | Use a file with actual segmentation labels |
| "Too many unique values" | File appears to be raw image data | Select a segmentation output, not raw images |
| Generation takes very long | Large volume or many classes | Normal for large data; wait for completion |
| Can't click Generate | No output format selected | Check at least one format checkbox |
| File validation failed | Uploaded file is not a valid segmentation | Ensure file is a labeled TIFF with integer values |
Related Help Articles
Module Overview:
- Mesh Generation — Module introduction
Step-by-Step:
- Segmentation Data — Input requirements and validation
- Output Options — Format selection and class options