Appearance
Getting Started
Welcome to the Biomedical Image Processing Workspace. This guide walks you through account setup, the workspace interface, and basic navigation.
Overview
The workspace provides a complete environment for biomedical image analysis:
- Segmentation — Train U-Net models to identify structures in microscopy images
- Denoising — Remove noise using deep learning (N2V, autoStructN2V) or filters
- Annotation — Create training data with brush-based labeling tools
- Mesh Generation — Convert segmentation results to 3D surface meshes
- Visualization — Explore 3D meshes interactively
- Image Viewing — Browse and inspect TIFF stacks
Account Setup
Registration
To create an account, click the Register tab on the welcome page.
Required Fields:
| Field | Requirements |
|---|---|
| Username | 3-20 characters, letters, numbers, and underscores only |
| Valid email address | |
| Password | Minimum 8 characters |
| Confirm Password | Must match password |
| Full Name | Your name (displayed in workspace) |
| Institution | Your university, research institute, or organization |
After submitting, your account is created with pending status.
Account Approval Workflow
New accounts require administrator approval for full access:
| Status | What You Can Do |
|---|---|
| Pending | Log in, explore the workspace, use built-in test data, train models and run inference with test data |
| Active | Full access: upload custom files, import models, all features |
| Rejected | Cannot log in (contact administrator) |
Note: You can start using the workspace immediately with test data while waiting for approval. You'll be notified once your account is approved for custom uploads.
Login
Enter your username and password on the Login tab. After successful login:
- New users: Redirected to the workspace
- Returning users: See "Welcome back" message with "Launch Workspace" button
Welcome Page
The welcome page is your entry point to the application.
 Welcome page elements
For New/Logged-Out Users
| Element | Location | Description |
|---|---|---|
| Login Tab | Center | Enter credentials to access workspace |
| Register Tab | Center | Create a new account |
| Theme Toggle | Top-left | Switch between light and dark mode |
| Partner Logos | Top-right | Physics of Parasitism and DFG logos |
For Logged-In Users
| Element | Description |
|---|---|
| Welcome Message | "Welcome back, [Your Name]" |
| Launch Workspace | Button to enter the main workspace |
| Logout | End your session |
| Admin Dashboard | Link to admin panel (administrators only) |
Workspace Layout
The workspace uses a three-panel layout:
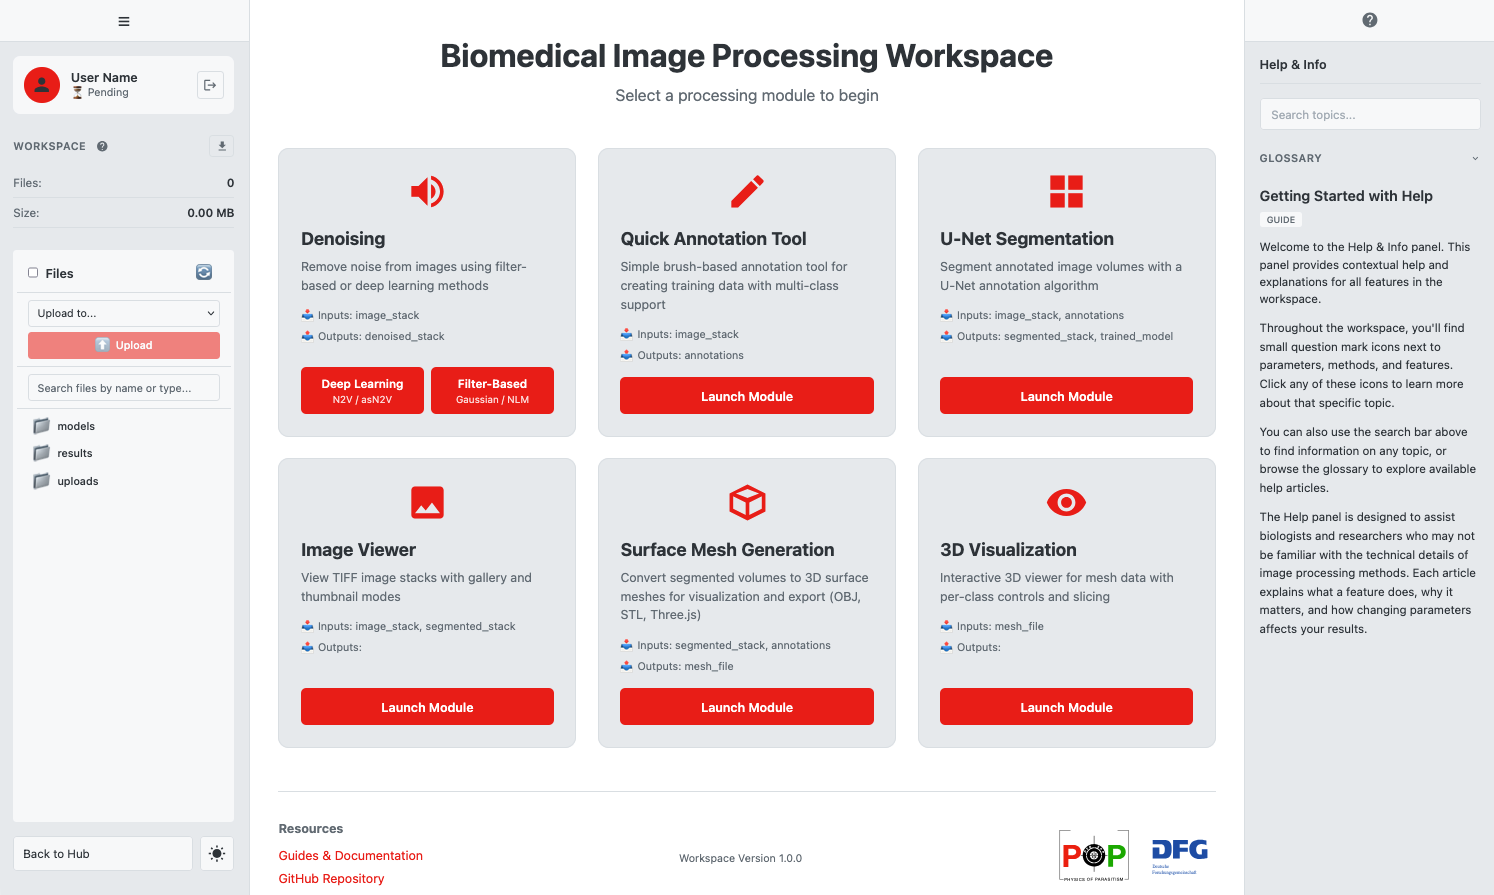 The main workspace interface
Left Sidebar
The sidebar provides workspace controls and navigation.
User Info Section
| Element | Description |
|---|---|
| Avatar | User icon |
| Name | Your full name or username |
| Status Badge | "Approved" or "Pending" |
| Logout Button | Exit icon to end session |
Workspace Section
| Element | Description |
|---|---|
| "Workspace" Header | With help icon (click for documentation) |
| Download Button | Download entire workspace as ZIP |
| Stats | File count and total size |
File Browser Section
Browse and manage files in your workspace. See the File Browser Guide for details.
Sidebar Footer
| Element | Description |
|---|---|
| Back to Hub | Return from a module to the main view |
| Theme Toggle | Sun/moon icon for light/dark mode |
Sidebar Toggle
Click the hamburger menu (three lines) at the top-left to collapse or expand the sidebar.
Main Content Area (Hub)
The hub displays available processing modules as cards in a grid.
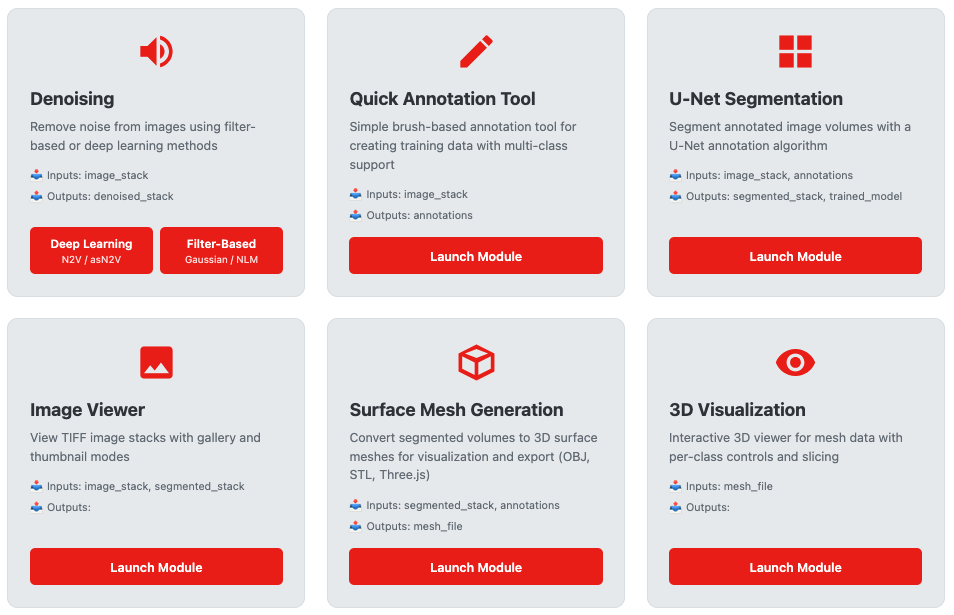 Module cards in the workspace hub
Module Card Anatomy
Each card contains:
| Element | Description |
|---|---|
| Icon | Visual identifier for the module |
| Name | Module title (e.g., "U-Net Segmentation") |
| Description | Brief explanation of functionality |
| Inputs/Outputs | What data the module accepts and produces |
| Launch Button | Click to enter the module |
| Help Icon | Question mark — opens help panel for this module |
Available Modules
| Module | Description |
|---|---|
| U-Net Segmentation | Train models and segment images |
| Denoising | Remove noise (offers two options: Deep Learning or Filter-Based) |
| Quick Annotation Tool | Create training annotations with brush tools |
| Image Viewer | Browse TIFF stacks in gallery or thumbnail view |
| Surface Mesh Generation | Convert segmentation to 3D meshes |
| 3D Visualization | Interactive mesh viewer |
Special: The Denoising card shows two launch buttons side-by-side: "Deep Learning" (N2V/autoStructN2V) and "Filter-Based" (Gaussian/NLM).
Right Info Panel (Help System)
The help panel provides documentation and guidance.
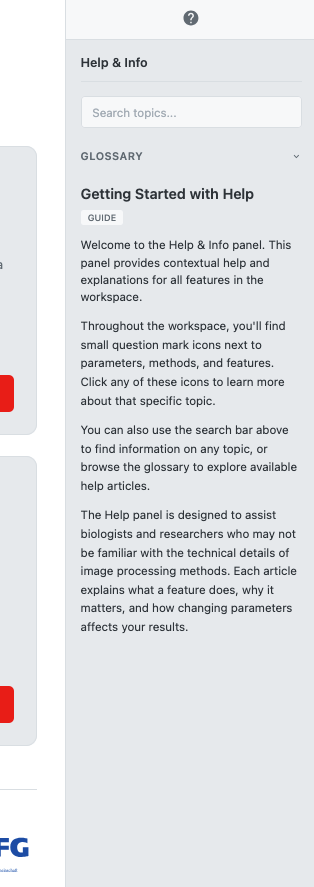 The help panel with search, glossary, and articles
Opening the Help Panel
- Click the ? toggle button on the right edge of the screen
- Or click any help icon throughout the interface
Help Panel Features
| Tab | Description |
|---|---|
| Search | Full-text search across all articles |
| Glossary | Alphabetical terminology definitions |
| Article View | Detailed documentation on selected topic |
For more details, see the Help & Info Guide.
Navigation
Launching a Module
- Find the module card in the hub
- Click Launch Module (or the specific option for Denoising)
- The hub view hides and the module interface appears
- Follow the step-by-step workflow within the module
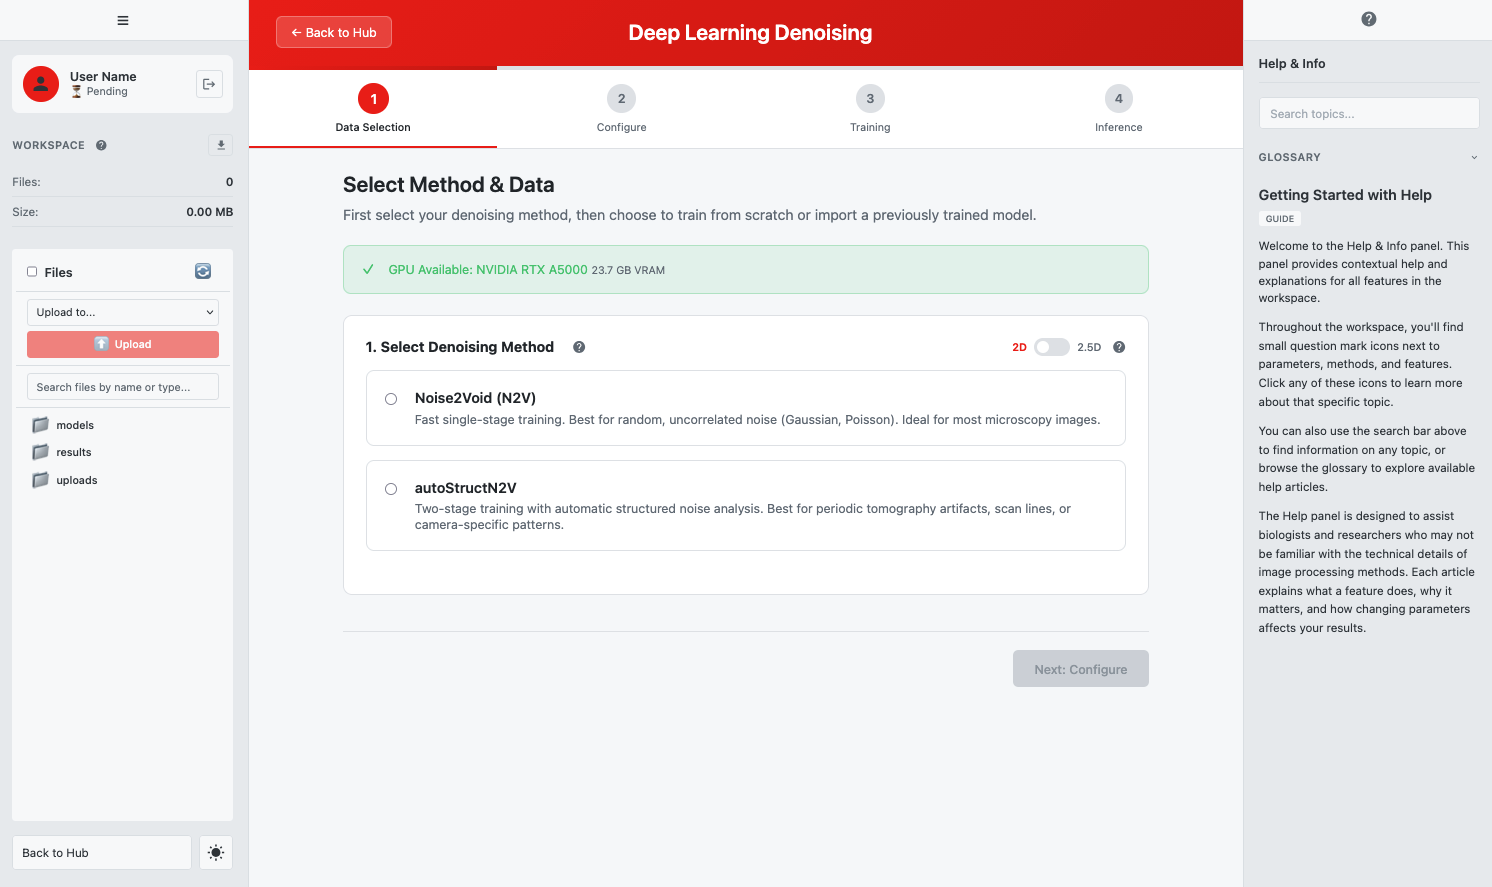 Inside a module with step navigation
Step Navigation
Most modules guide you through steps:
| Element | Description |
|---|---|
| Step Indicators | Shows current step and progress |
| Next/Previous Buttons | Navigate between steps |
| Step Content | Current step's interface |
Returning to Hub
To exit a module and return to the main hub:
- Click Back to Hub in the sidebar footer
- The module closes and the hub reappears
- Your progress may be saved depending on the module
Theme Toggle
Switch between light and dark mode:
- Click the sun/moon icon in the sidebar footer
- The interface updates immediately
- Your preference is saved and persists across sessions
| Mode | Description |
|---|---|
| Light | White background, dark text (default) |
| Dark | Dark background, light text |
Quick Reference
Keyboard Shortcuts
The workspace primarily uses mouse/touch navigation. Module-specific shortcuts are documented in each module guide.
Key Locations
| Action | Location |
|---|---|
| Logout | Sidebar → User Info section |
| Download Workspace | Sidebar → Workspace section |
| Return to Hub | Sidebar → Footer |
| Theme Toggle | Sidebar → Footer |
| Open Help | Right edge toggle or any help icon |
| Launch Module | Hub → Module card |