Appearance
Quick Annotation Tool Module Guide
The Quick Annotation Tool is a browser-based painting interface for creating ground-truth segmentation masks on TIFF image stacks. These annotations serve as training data for U-Net segmentation models or can be used directly for mesh generation.
For a conceptual overview, see Annotation.
 The Annotation Tool interface with canvas, toolbar, and class management
Quick Start
- Launch module — Click "Quick Annotation Tool" from the workspace hub
- Select an image — Choose a TIFF stack to annotate (new, resume, or edit)
- Paint annotations — Use the brush tool to label regions of interest
- Navigate slices — Use arrow keys or buttons to move through the stack
- Save your work — Click "Save Progress" or "Create Annotation" when done
Step-by-Step Guide
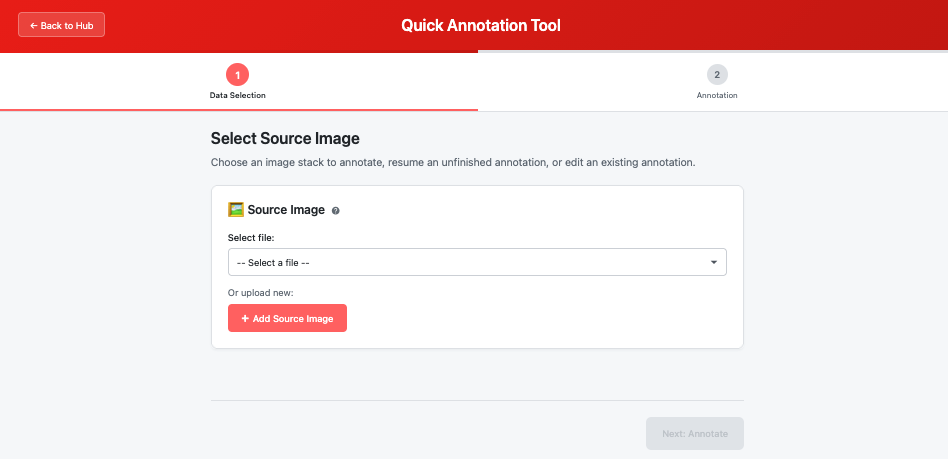
Step 1: Data Selection
Choose your source image and annotation mode.
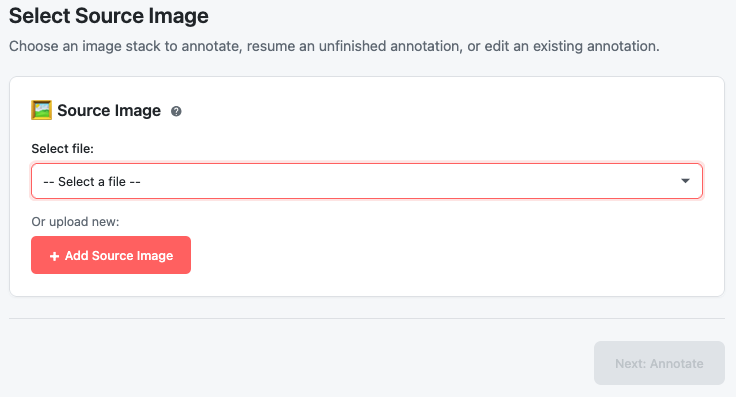 Step 1 with annotation mode selection and file chooser
Input Options
| Mode | Description | When to Use |
|---|---|---|
| New Annotation | Start fresh on a raw TIFF image | Creating annotations from scratch |
| Resume | Continue an unfinished annotation | Returning to work in progress |
| Edit | Modify an existing completed annotation | Refining previous work |
File Requirements
- Format: Multi-page TIFF (.tif or .tiff)
- Bit Depth: 8-bit or 16-bit grayscale
- Channels: Single channel (grayscale)
Tip: Large files work but may affect performance. Consider splitting very large stacks.
For more details, see Source Image.
Click "Next" to proceed to the annotation interface.
Step 2: Annotation Interface
The annotation interface provides all tools needed to paint segmentation masks.
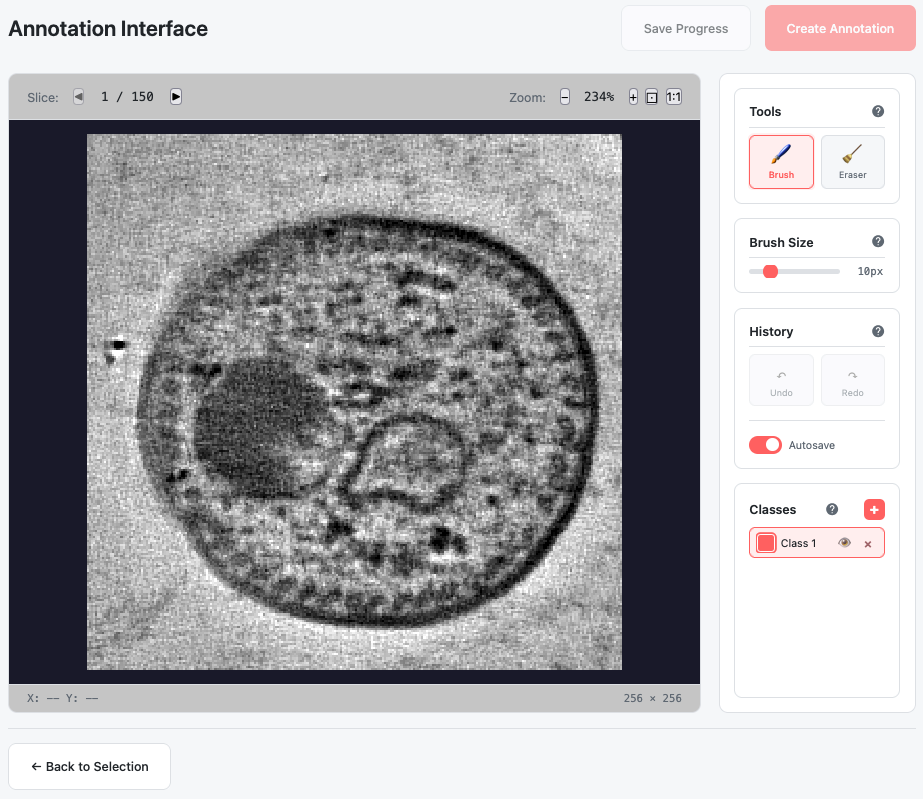 Annotation interface with canvas, toolbar, and control areas
Interface Layout
| Area | Location | Purpose |
|---|---|---|
| Canvas | Center | Main painting area showing current slice |
| Toolbar | Right side | Tools, brush size, history, and class management |
| Control Bar | Above canvas | Slice navigation and zoom controls |
| Status Bar | Below canvas | Cursor coordinates and image dimensions |
Tools
Brush Tool
Paint annotations with the currently selected class.
| Property | Value |
|---|---|
| Shortcut | B |
| Behavior | Click and drag to paint continuous strokes |
| Color | Uses the active class color |
Eraser Tool
Remove annotations by painting with background (transparent).
| Property | Value |
|---|---|
| Shortcut | E |
| Behavior | Click and drag to erase |
| Effect | Sets pixels to background (class 0) |
Tip: The eraser respects class visibility—it only erases classes that are currently visible.
For more details, see Annotation Tools.
Brush Size
Control the size of your brush and eraser.
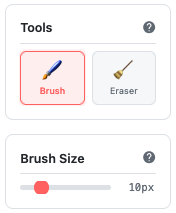 Brush size slider in the toolbar with pixel size display
| Control | Action |
|---|---|
| Slider | Drag to adjust size (1-50 pixels) |
| [ key | Decrease size by 5 pixels |
| ] key | Increase size by 5 pixels |
The current size is displayed next to the slider (e.g., "10px").
For more details, see Brush Size.
Class Management
Manage the classes (labels) you're annotating.
 Class management panel with color swatches and visibility toggles
Class List
Each class shows:
- Color swatch — The class color (auto-assigned)
- Name — Class label (e.g., "Class 1")
- Visibility toggle — Show/hide this class on canvas
- Delete button — Remove class and all its pixels
Class Actions
| Action | How |
|---|---|
| Add class | Click the "+" button in the Classes header |
| Select class | Click on a class to make it active for painting |
| Toggle visibility | Click the eye icon to show/hide |
| Delete class | Click the × button (removes all pixels with that class) |
Note: Colors are automatically assigned using a color distribution algorithm that ensures good visual separation between classes.
For more details, see Annotation Classes.
Canvas Controls
Zoom
| Control | Action |
|---|---|
| + button | Zoom in (125% of current) |
| − button | Zoom out (80% of current) |
| Fit button (⊡) | Auto-fit image to view |
| 1:1 button | Reset to 100% zoom |
| Mouse wheel | Scroll to zoom (toward cursor) |
Zoom range: 10% to 1000%
Pan
| Method | How |
|---|---|
| Right-click + drag | Pan the canvas |
| Middle-click + drag | Pan the canvas |
| Space + left-click + drag | Hold Space, then drag to pan |
Tip: When zoomed in, the cursor changes to a hand icon to indicate you can pan.
Slice Navigation
Navigate through the 3D stack to annotate each slice.
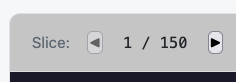 Slice navigation with previous/next buttons and position indicator
| Control | Action |
|---|---|
| ◀ button | Go to previous slice |
| ▶ button | Go to next slice |
| Left arrow key | Previous slice |
| Right arrow key | Next slice |
| Slice indicator | Shows current position (e.g., "12 / 64") |
Note: Each slice has its own independent undo/redo history.
History (Undo/Redo)
Undo and redo your painting actions on the current slice.
| Action | Shortcut | Button |
|---|---|---|
| Undo | Ctrl+Z (Cmd+Z on Mac) | ↶ button |
| Redo | Ctrl+Y or Ctrl+Shift+Z | ↷ button |
- History is per-slice — each slice maintains its own history
- Maximum 20 undo states per slice
- Buttons are disabled when no history is available
Saving Your Work
Save Progress
Save your work-in-progress to continue later.
- Button: "Save Progress" (in header)
- Status: Marked as "in progress"
- Location: Saved to
unfinished_annotations/folder - Resume: Select "Resume" in Step 1 to continue
Create Annotation
Finalize your annotation for use in training or mesh generation.
- Button: "Create Annotation" (in header)
- Status: Marked as "complete"
- Location: Saved to
annotations/folder - Use: Ready for Segmentation training or Mesh generation
Autosave
Automatic saving protects against data loss.
| Setting | Default |
|---|---|
| Enabled | Yes (toggle in toolbar) |
| Interval | Every 2 minutes |
| Condition | Only saves if changes exist |
Tip: Even with autosave enabled, remember to click "Create Annotation" when you're finished to mark the annotation as complete.
Keyboard Shortcuts
| Shortcut | Action |
|---|---|
| B | Switch to brush tool |
| E | Switch to eraser tool |
| [ | Decrease brush size |
| ] | Increase brush size |
| Ctrl+Z | Undo |
| Ctrl+Y | Redo |
| Left Arrow | Previous slice |
| Right Arrow | Next slice |
| Space + Drag | Pan canvas |
| Mouse Wheel | Zoom in/out |
Output Files
| File | Description | Location |
|---|---|---|
annotation.tif | Multi-page TIFF with class labels as pixel values | annotations/ or unfinished_annotations/ |
annotation.json | Metadata including class definitions and source info | Same as TIFF |
TIFF Format:
- 8-bit grayscale
- Pixel value = class ID (0 = background, 1+ = classes)
- One page per slice in the stack
Troubleshooting
| Issue | Cause | Solution |
|---|---|---|
| Can't paint on canvas | Wrong tool or no class selected | Press B for brush, ensure a class is selected |
| Brush not visible | Class visibility turned off | Click the eye icon to show the active class |
| Undo not working | No actions to undo on this slice | Undo history is per-slice; may need to check other slices |
| Changes not saving | Network error or autosave disabled | Click "Save Progress" manually; check console for errors |
| Image not loading | File too large or invalid format | Try a smaller file or check TIFF format |
| Lost my work | Browser closed without saving | Check unfinished_annotations/ for autosaved progress |
Related Help Articles
Module Overview:
- Quick Annotation Tool — Module introduction and concepts
Tools & Controls:
- Drawing Tools — Brush and eraser details
- Brush Size — Size adjustment and shortcuts
- Annotation Classes — Adding and managing classes
- History & Autosave — Undo/redo and automatic saving
Data:
- Source Image Selection — Input requirements